
Getting Started
This page walks through the full path from an Open Platform account to the first SDK Open local runtime call.
1. Create an Open Platform Account
- Open the platform site and go to the registration page.
- Select a country or region.
Chinese Mainlanduses SMS verification; other regions use email verification. - Complete verification and set a password.
- After login, create an app and manage API keys in the console.
2. Create an App and API Key
Create an app in the console, then create an API key for that app. 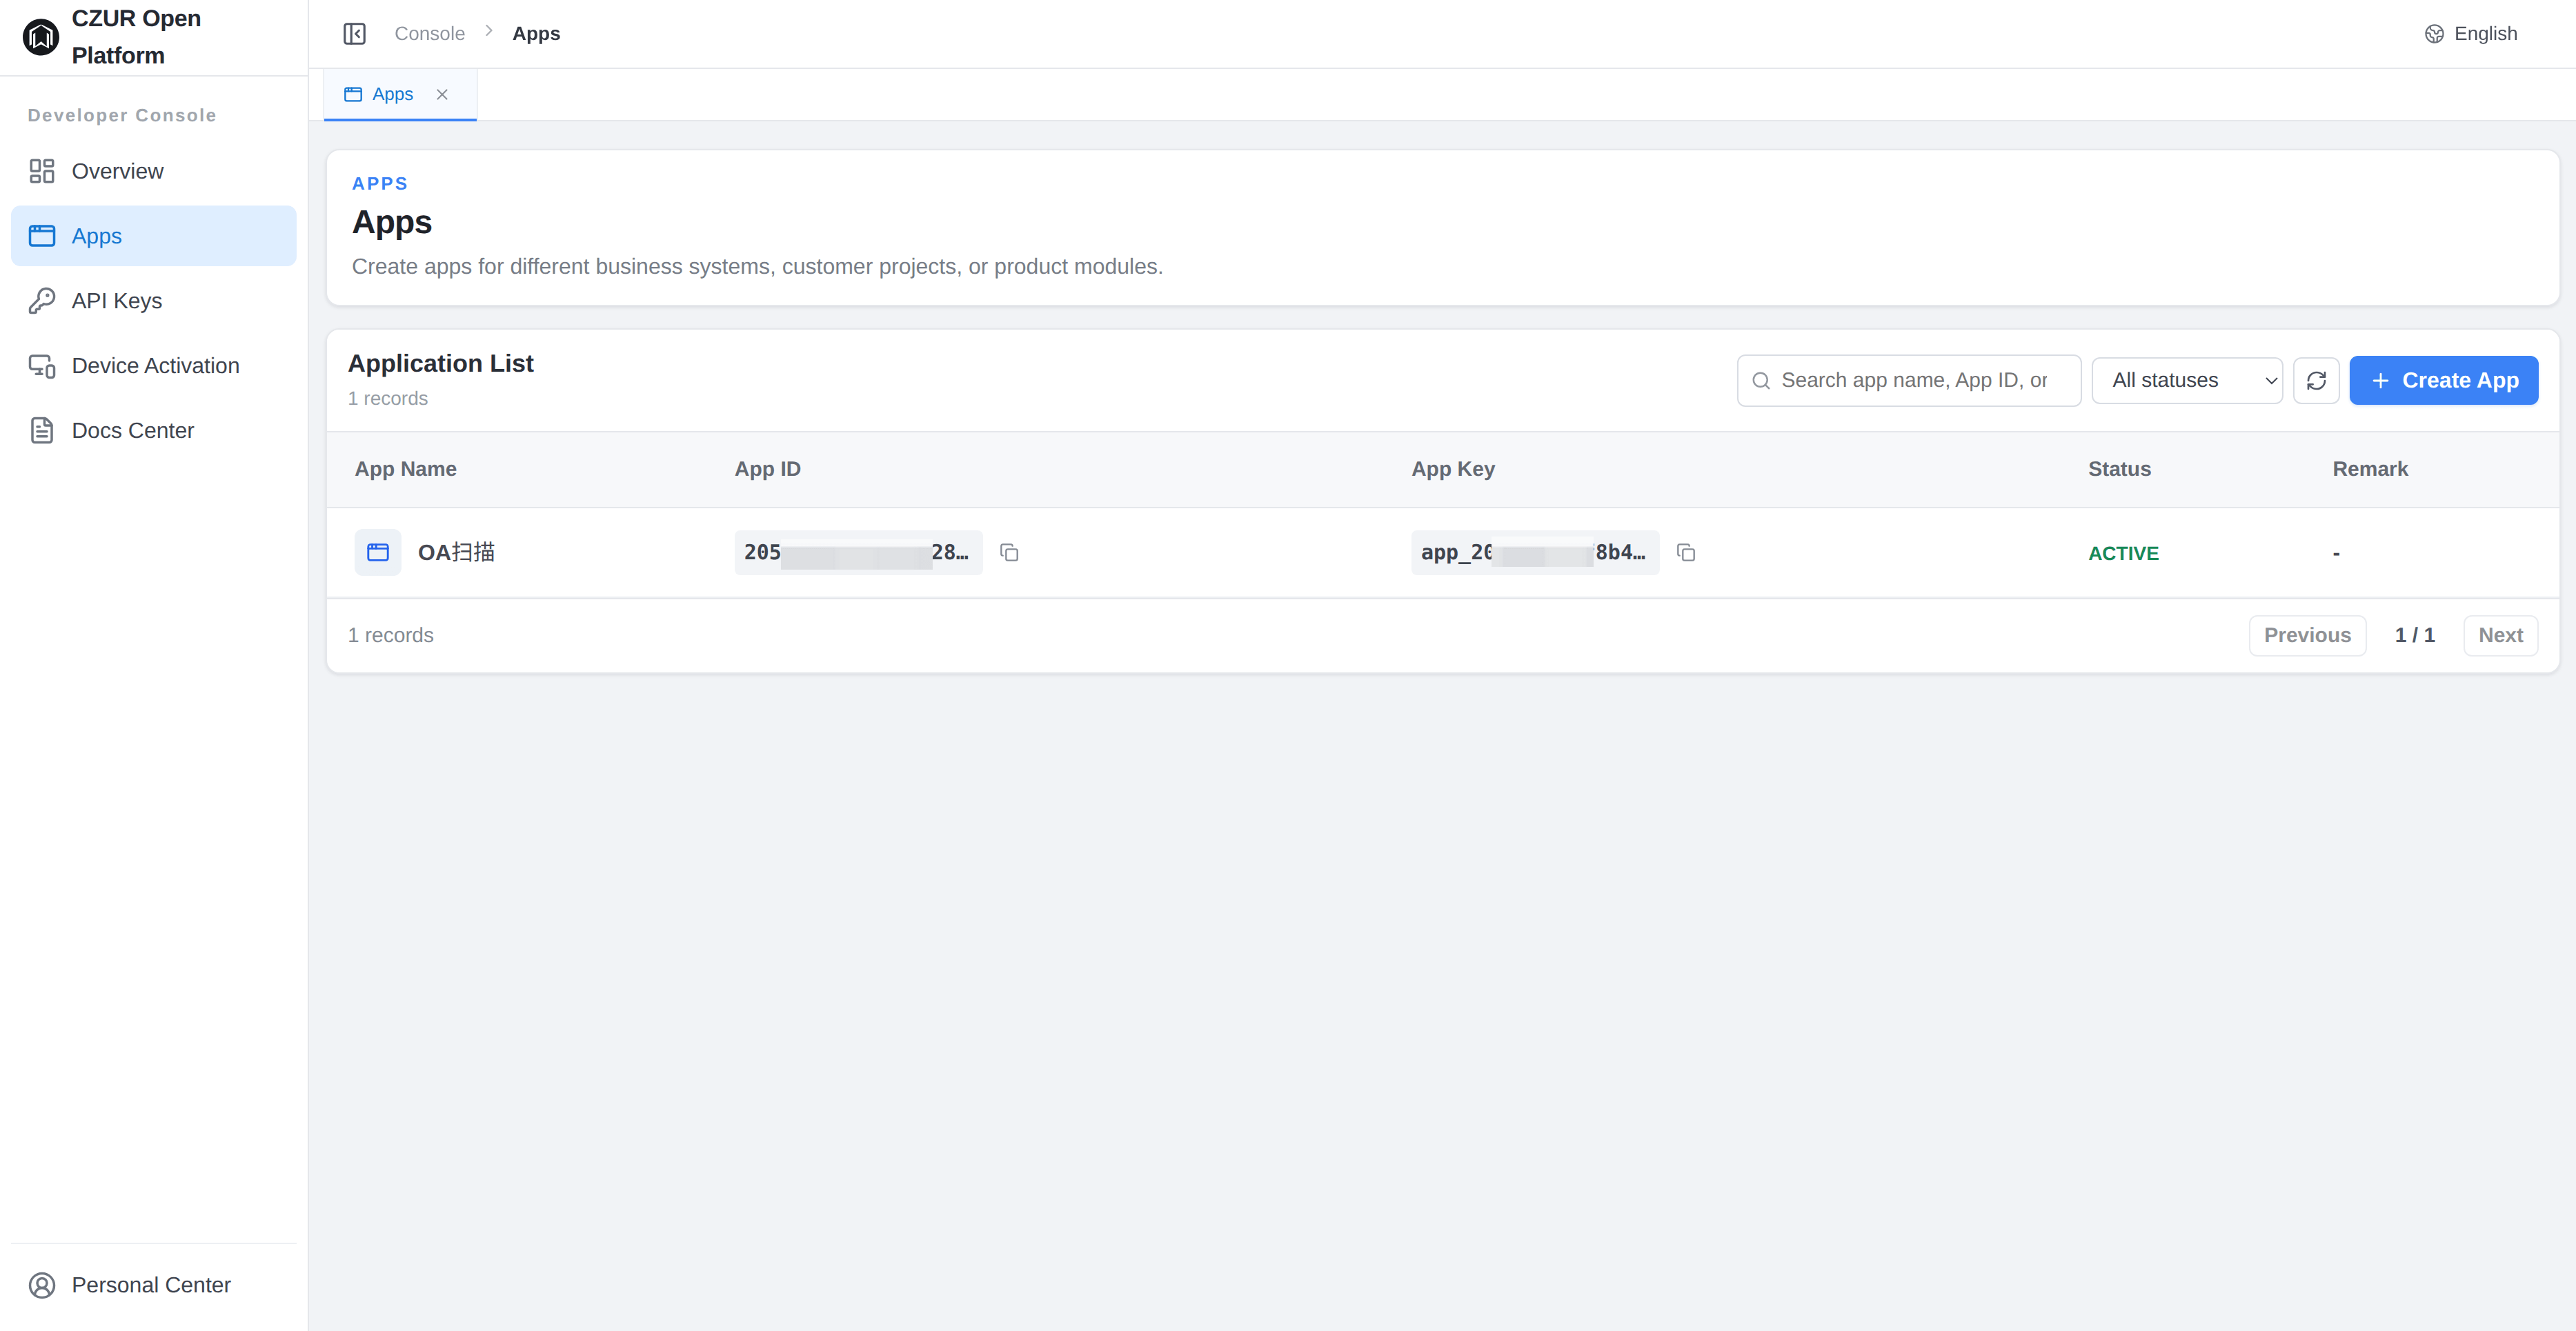
The full API key is shown only once when it is created or rotated. Store it securely. Use this API key for authorization validation in later calls. 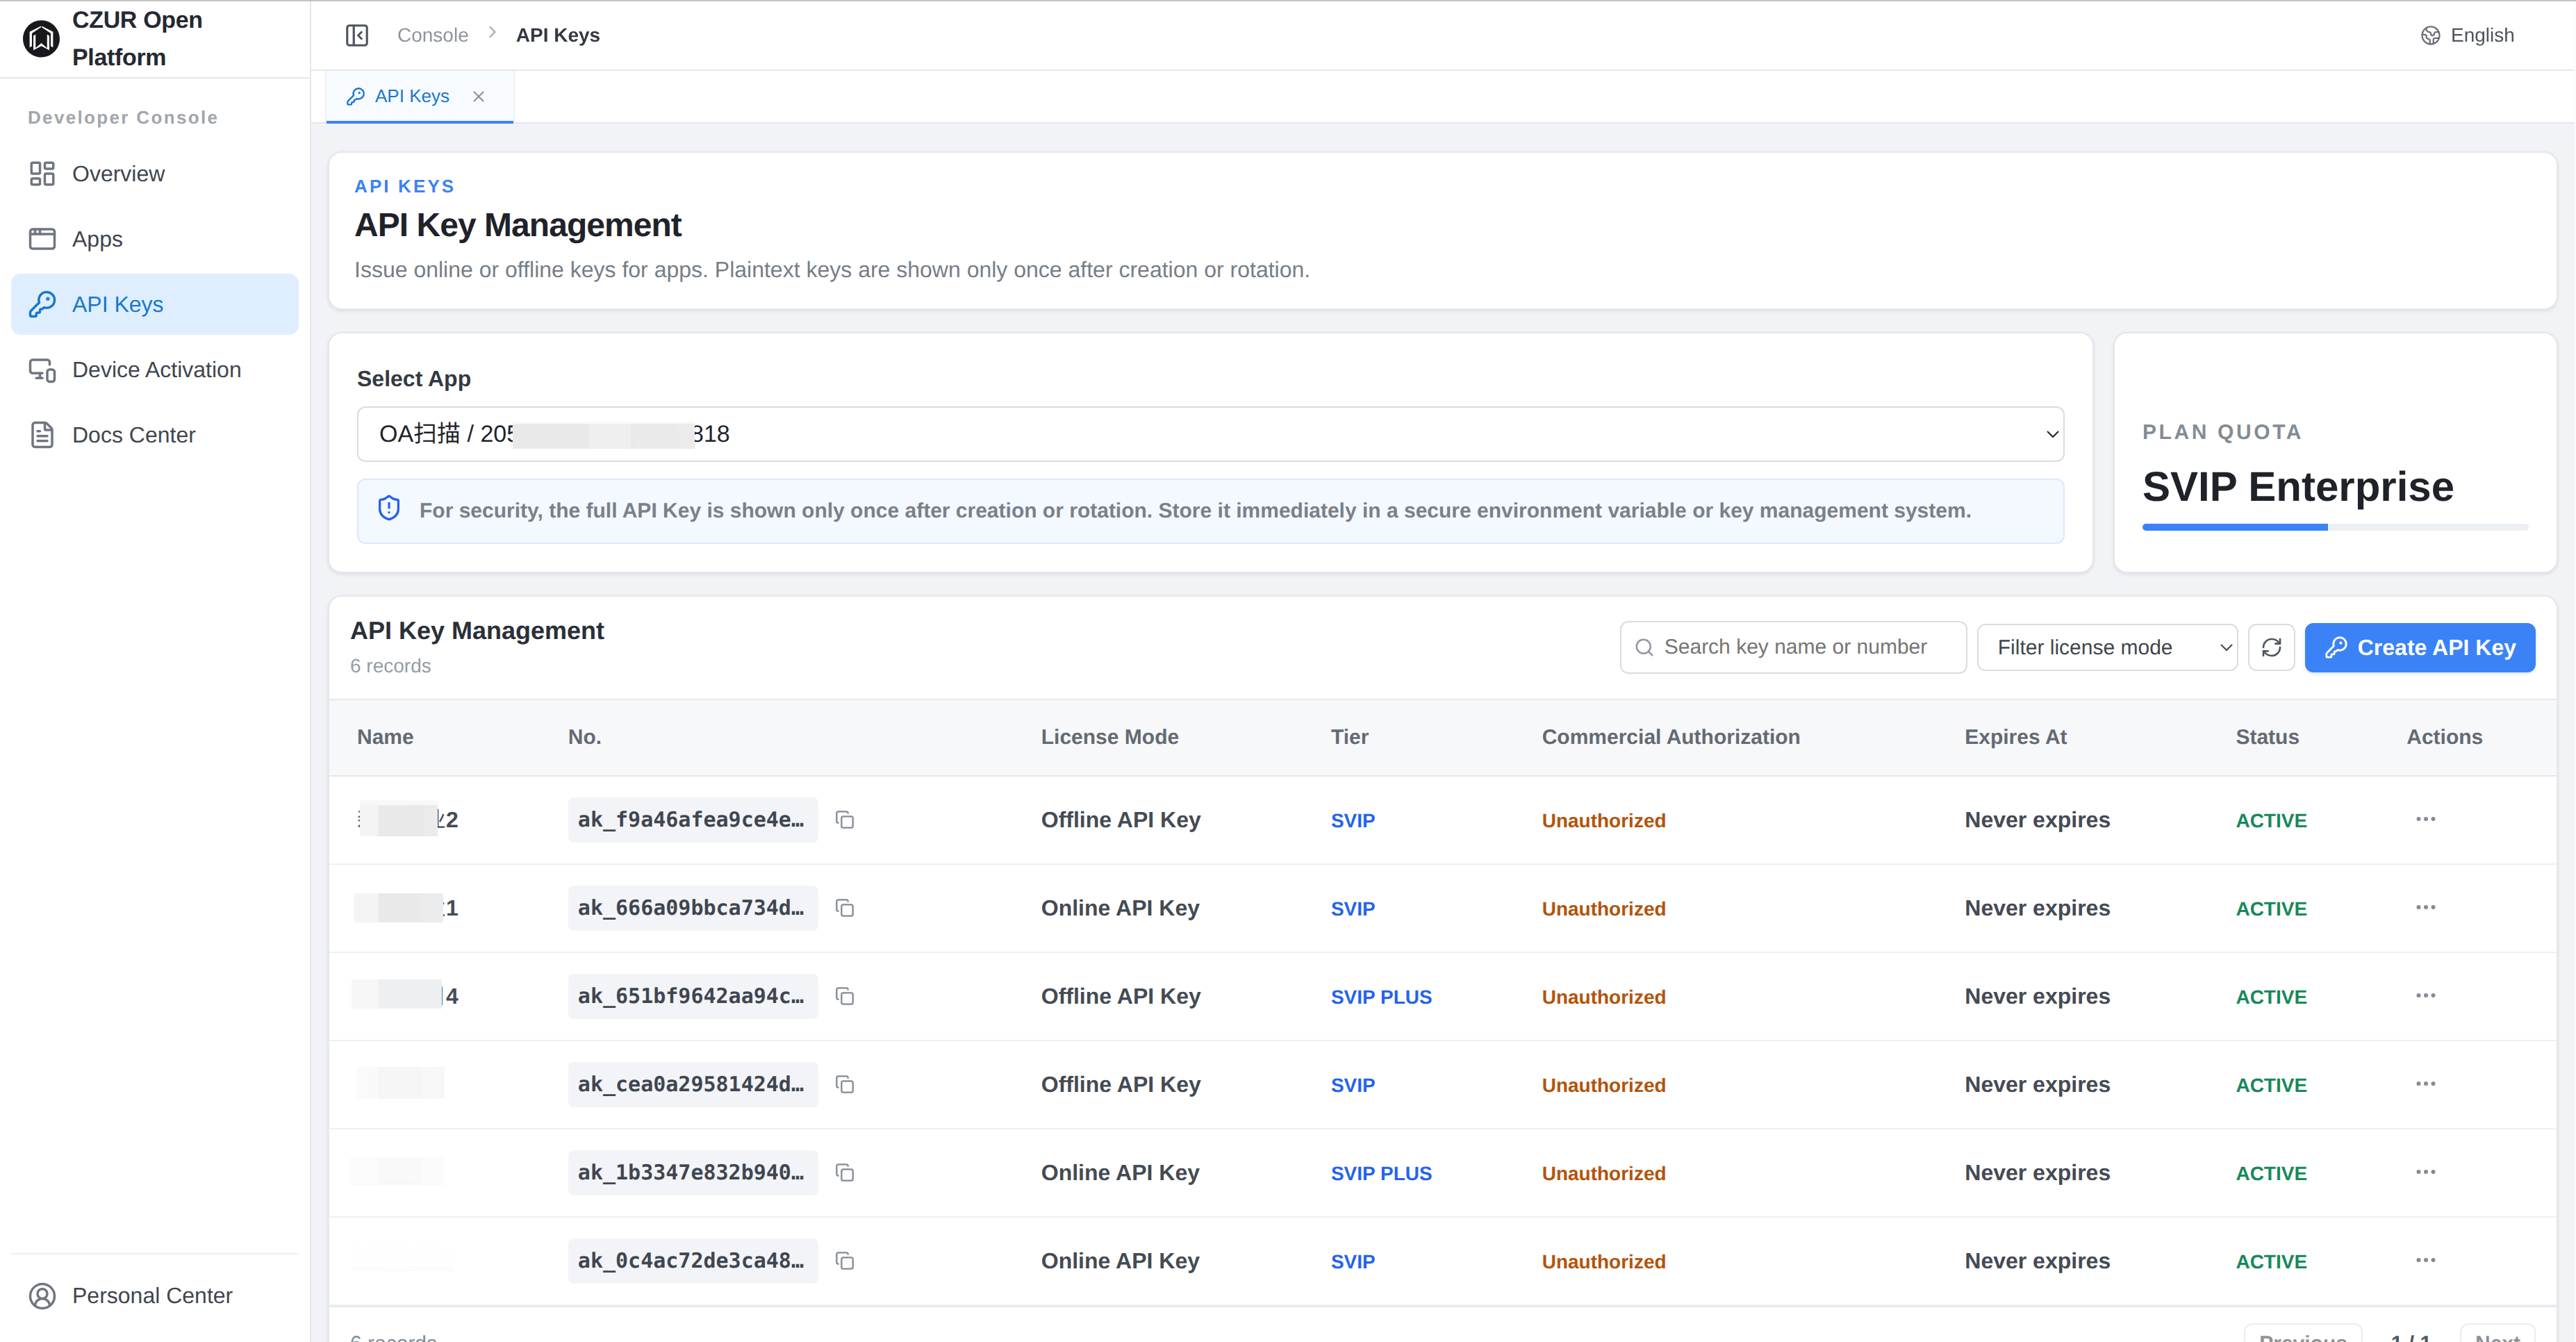
3. Download, Install, and Start the Local SDK Runtime
Linux distributions use a deb package. After installation, the SDK runtime runs as a local background service. Future Windows and macOS packages will use the same integration model: install the local runtime first, then call capabilities through local HTTPS/WSS endpoints.
Download the latest package:
- GitHub Releases:
https://github.com/CZUR-Developer/czur-sdk-open/releases - Gitee Releases:
https://gitee.com/czur_dl/czur-sdk-open/releases
Install the deb package and start the service on Linux:
sudo apt install ./sdk-open_<version>_<arch>_common.deb
sudo systemctl enable --now sdk-open.service
systemctl status sdk-open.service
Default external SDK endpoints:
| Endpoint | Address | Purpose |
|---|---|---|
| Admin HTTP | http://127.0.0.1:17080 | Health, runtime status, config, and logs. |
| Demo HTTP | http://127.0.0.1:17081 | Local demo site. |
| Asset HTTPS | https://sdk-runtime.localhost:18082 | Upload images and read capture/process/convert assets. |
| Command WSS | wss://sdk-runtime.localhost:18090 | JSON command channel. |
| Video WSS | wss://sdk-runtime.localhost:18091 | Video frame output channel. |
The external SDK enables TLS by default and maps sdk-runtime.localhost to 127.0.0.1. Regular clients should use the HTTPS/WSS endpoints above; plaintext HTTP/WS is for compatibility scenarios only. A Video WSS connection must also include the session_token and stream_id query parameters. See Connectivity for TLS certificates, trust, and custom deployment details.
Open the Local Demo Site
After the runtime is installed and started, open http://127.0.0.1:17081 in a browser to access the local demo site. Input the API key created earlier to access the demo site. The demo site is useful for validating end-to-end flows such as connection, authorization, devices, video, capture, uploads, and task polling. 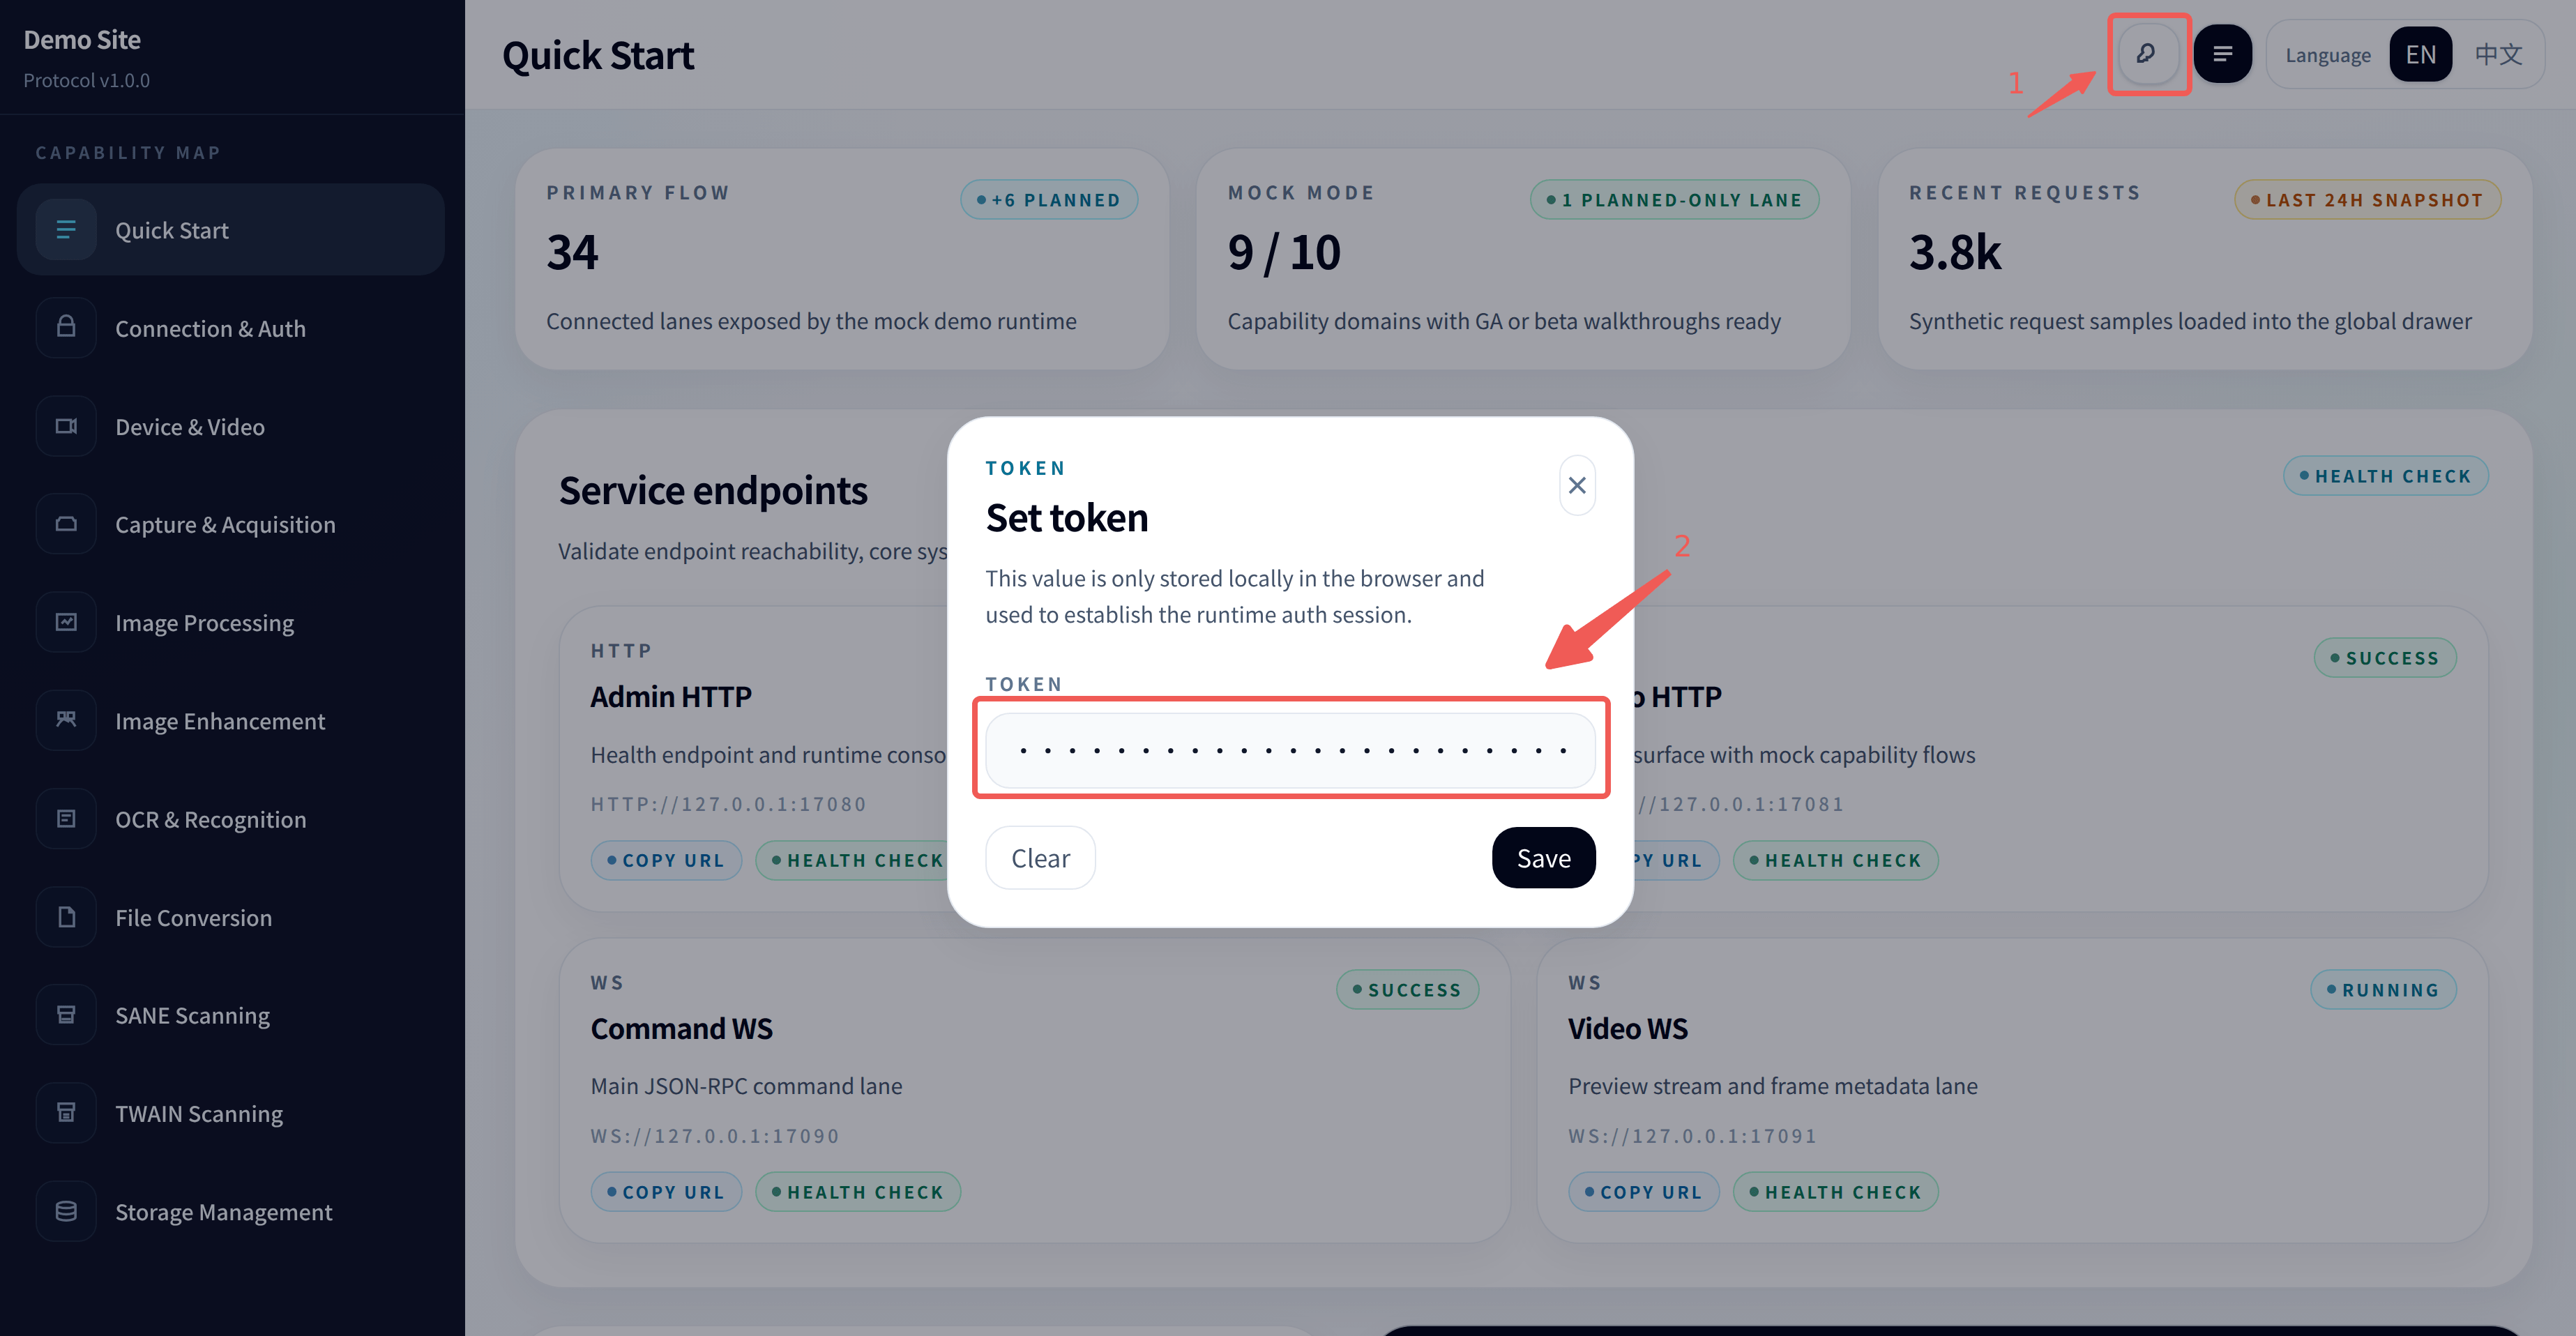
If the runtime configuration overrides the default port, use ports.demoHttp from system.info or the actual runtime configuration. The demo source lives under src/sdk_open/frontend/demo-site; for normal integration checks, use the local site served by the runtime first.
Confirm the runtime after installation:
curl http://127.0.0.1:17080/healthz4. Connect Command WS and Create a Session
type CommandResponse<T = Record<string, unknown>> = {
  request_id: string
  code: number
  message: string
  data: T
  ts: number
}

const ws = new WebSocket('wss://sdk-runtime.localhost:18090')
let seq = 0

function call(method: string, params: Record<string, unknown> = {}) {
  ws.send(JSON.stringify({
    request_id: `req-${++seq}`,
    method,
    params,
    client: {
      source: 'your-app',
      protocol_version: '2.0.0',
      trace_id: `trc-${Date.now()}`
    }
  }))
}

ws.addEventListener('open', () => {
  call('system.ping')
  call('auth.create_session', { token: 'sk-sq-v1-...' })
})

ws.addEventListener('message', (event) => {
  const payload = JSON.parse(event.data) as CommandResponse
  console.log(payload.request_id, payload.code, payload.data)
})
After auth.create_session succeeds, the session is bound to the current Command WS connection. Business methods do not need to carry the API key again.
5. Call Capabilities
Recommended first-call order:
system.ping
auth.create_session
system.capabilities
device.list
device.get
device.open
video.start
connect Video WSS
capture.take or image.process / ocr.recognize / file.convert
video.stop
device.close
auth.destroy_session
To upload local files for image, OCR, or conversion methods:
async function uploadImage(sessionToken: string, file: File) {
  const form = new FormData()
  form.set('file', file)

  const response = await fetch('https://sdk-runtime.localhost:18082/api/uploads/images', {
    method: 'POST',
    headers: { Authorization: `Bearer ${sessionToken}` },
    body: form
  })

  return response.json() as Promise<{
    upload_id: string
    asset: { asset_id: string; url: string; download_url: string }
  }>
}
Use the returned upload_id as input_upload_id in image.process, image.enhance, ocr.extract_text, recognition.barcode_detect, or file.convert.